
CSV Upload Overview
The CSV upload feature is on the Data page, and is active after a Data Entry Form or Workflow is selected. Uploading a CSV is useful when large amounts of historical data need to be entered into the system, and when batches of data from other systems or processes needs to be added to the platform.
If the necessary form you want to add/upload data to is already created, great! If not, use the “Create new Form” button from the bottom left of the page to do so, making sure to populate the form with fields that match your CSV.
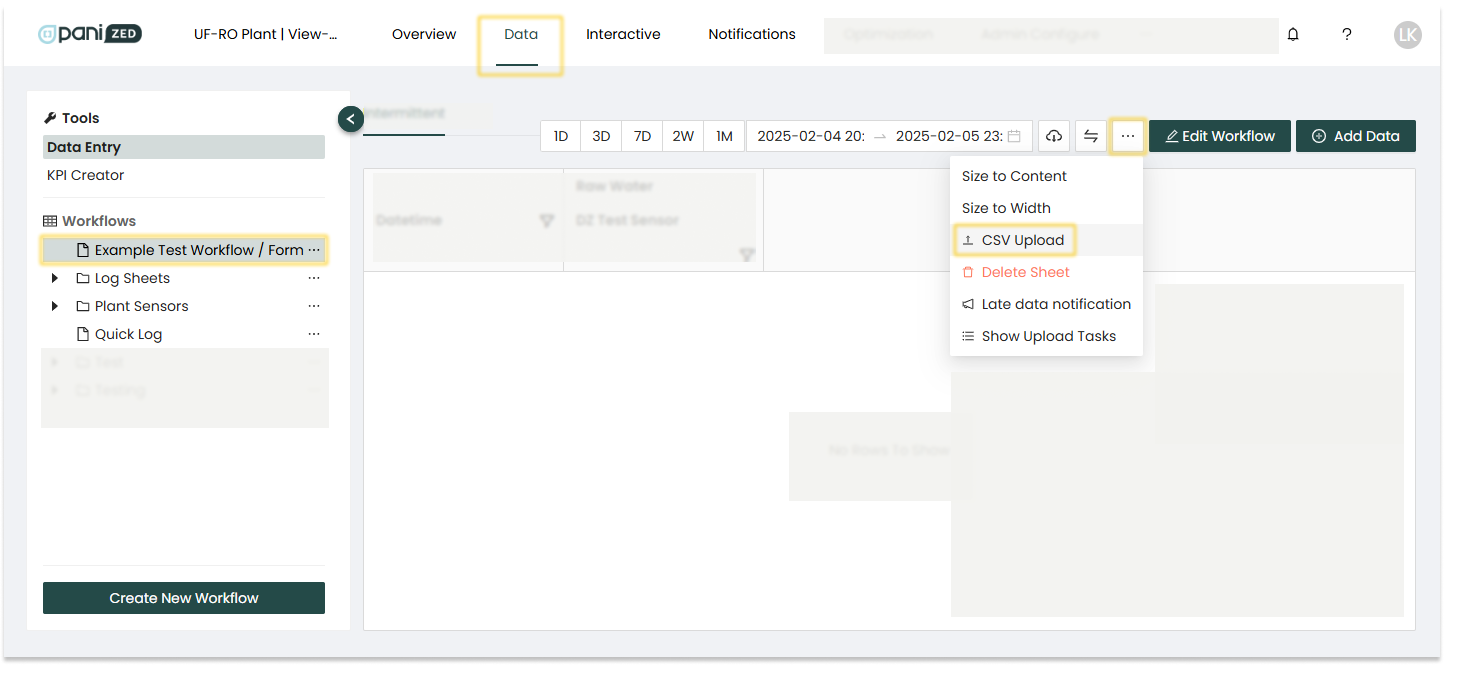
Image above: Highlights showing the Data page > Example Test Workflow / Form chosen in left panel > '...' menu from upper right selected > CSV Upload option shown
The CSV file fields need to map to the desired Data Entry Form or Workflow within the platform. In this regard, there are some important things to take into account to ensure successful CSV file uploads.
First thing to note is the date and time formatting (including timestamp). The recently updated CSV upload system now infers the date and timestamp format based on the first one it finds within the CSV file, which must be one of the following 5 formats:
- ISO8601 -- 2024-12-13T1:30:00-08:00
(standard format that comes out of PLC and data historians; note: the T can be replaced with a space) - MM/DD/YY HH:MM -- 12/13/24 13:30
(standard date format in Excel) - MM/DD/YY I:MM P -- 12/13/24 1:30 PM
(standard date format in Excel) - MM/DD/YYYY HH:MM -- 12/13/2024 13:30
(standard date format in Excel) - MM/DD/YYYY I:MM P -- 12/13/2024 1:30 PM
(standard date format in Excel)

Image above: Highlights showing one way to set the date format in an Excel sheet (online) > Date cell selected > Right click > Format Cells > Number menu > Date category > two of five accepted formats shown
To avoid upload errors:
- Ensure you select the correct date format in the CSV for the data you want to upload, from one of the five formats listed above.
- Ensure the Form *Interval that is selected matches the data intervals in the CSV. For example, if the data in the CSV to be uploaded is at intervals of "1 Minute" then make sure to select "1 Minute" intervals to match (rather than Daily or another option, which would result in an error). Note: all entry dates are truncated to 12:00:00. for a given day.
|
|
When setting up your column labels or header rows, the platform previously required that these labels or headers occupied only a single row of cells. Recent updates now allow extra header rows -- uploads should succeed as long as there's at least one valid data row for headers and labels.
Accepted: labels in one row only
| pH Raw | pH Outlet |
|---|---|
| 123 | 456 |
Now also accepted: labels occurring in two rows
| pH | |
| Raw | Outlet |
| 123 | 456 |
There are specific types of fields, such as text fields and numerical fields. For the Data Entry Form or Workflow that you'd like to upload a CSV to, it's important to match these field types. For example, form fields built to be defined as text fields need to receive only text in the corresponding CSV cells, and form fields built and defined as numerical need to be matched with numbers in the corresponding CSV cells.
Accepted: matching types together - numerical values only within numerical fields, text values only within text fields
| pH Quality (good, bad, or ugly) |
pH Outlet (#) |
|---|---|
| good | 456 |
Not accepted: mixing types - numerical values will create errors in text fields, and text will create errors if they appear in numerical fields
| pH Quality (good, bad, or ugly) |
pH Outlet (#) |
| 123 | bad |
If no data was available for a particular day or field, and this was denoted with a "-" in the CSV, this will result in an error and the data will not import into the system. To fix this, perform a 'Find-Replace' in the spreadsheet, replacing the "-" with nothing (an empty or blank cell).
Accepted: empty cell to represent no data
Not accepted: a dash, hyphen, or other symbol in the cell will result in an upload error
| TDS (MG/LIT) | |
| Raw TDS | Outlet |
| - | |
| 466 | 460 |
| 437 | 419 |
Maximum file size accepted is 10MB. If you have more data than this, it would need to be split up across smaller files.
You can map and re-map the order in of columns in the CSV to ensure they maps to the necessary corresponding form fields as they've been created in FormBuilder.
If exporting data from the platform to use as a template, the order of columns is the same when:
- Viewing data Workflows in-platform
- Exporting that Workflow's data to CSV
- Uploading CSV data to a Workflow
In other words, if you export a CSV then immediately upload it again, the columns in the CSV will be matched to the columns in the workflow in the CSV Upload modal by default without any manual re-ordering required.
Uploading the CSV to the Platform
When you have your CSV file prepared and ready for uploading, these are the steps:
Step 1: Navigate to the Data page from the upper bar menu, and select a Workflow from the left panel menu.
Step 2: Click the three dots " … " button in the upper right corner of the screen to show the drop-down selection menu.
Step 3: Select CSV Upload. The Upload CSV Report pop-up window will open.
Step 4: Click on the 'Upload CSV Data File' button in the middle of the pop-up; a new window will appear where you can navigate to your CSV file and select it for uploading.
Step 5: Click the Open button to upload your file to the platform.
If for any reason the selected file was incorrect, then you can scrap it and start again.
|
|
GIF above: Recording of Upload CSV Report window showing the full sequence of CSV Upload, from start to finish, including matching the date time format, scrolling through the fields, finalizing with the Accept button, the loading spinner that previously displayed during upload processing before upload complete and the final Successful completion message that used to be displayed (now replaced with Upload Task Status)
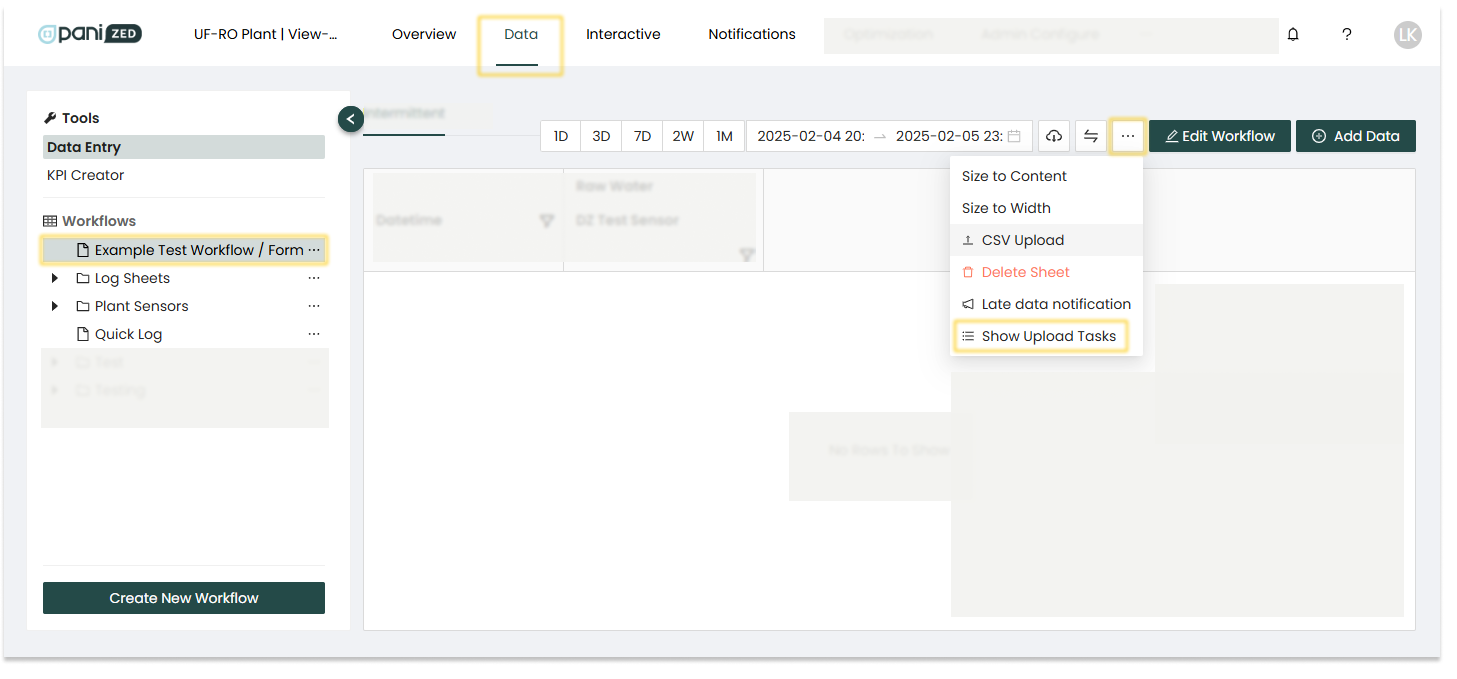
In the past, a successful upload notification will briefly appear on screen indicating your .CSV file was accepted by the platform. A spinner would be displayed until either the CSV was fully processed, or the operation timed out (typically after 60 seconds).
Now, the platform saves the file to and does the processing in the background (where it has access to more compute resources, and is not subject to a 60-second timeout) so you can carry on with other things and simply check the status as desired in the same '...' menu where the CSV Upload function is found, under the 'Upload Task Status' option.
Viewing Data After Uploading
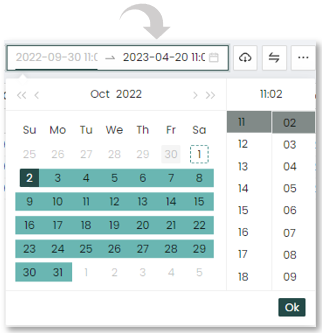
After you've uploaded your CSV, if you want to view the imported data, you must select the corresponding date range from the calendar bar (date picker) at the top of the page for that Workflow/Form.
|
|
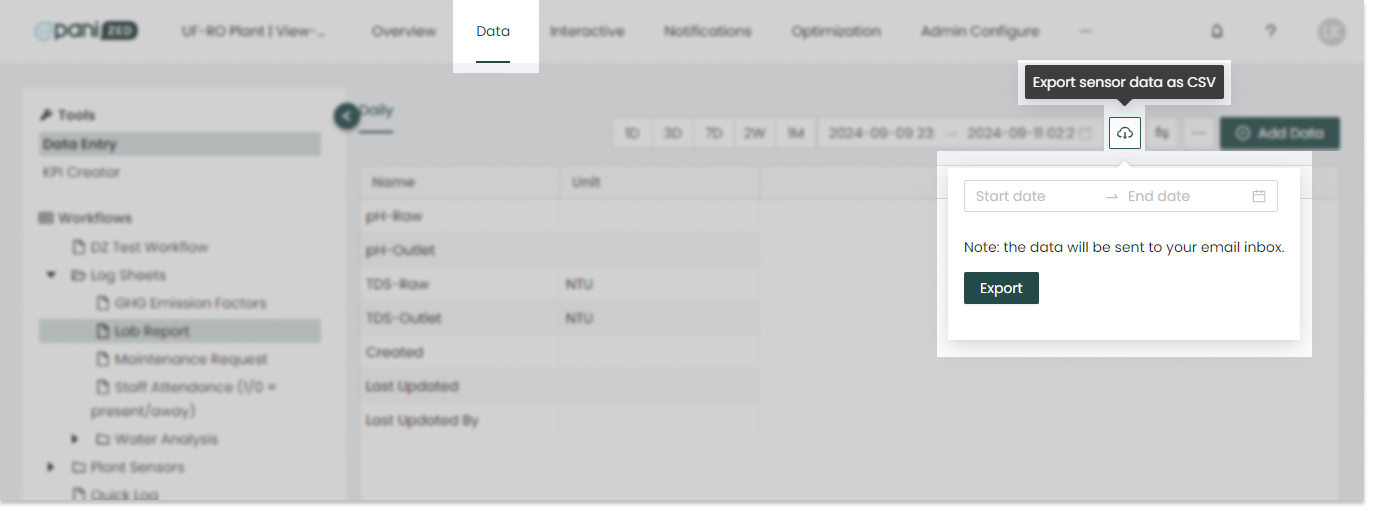
The CSV download or export feature is active when a form or workflow is selected. The format of this tabular data is preserved in the export, sent to the user's email inbox.
The user can take information from the Data Section and export it in a CSV format using the CSV download feature. To do this perform the following:
- Step 1: Click the CSV Download (cloud download icon) in the upper right section, beside the date picker.
- Step 2: Select the time range for the export. Note, there are some limits on data exports. If you need to download very high volumes of data, you may need to break it down into multiple exports.
- Step 3: Once the dates are selected, click the Export button and the file will automatically be downloaded and sent to the email address associated with your Pani Zed user account.
- Step 4: Retrieve the file from your email inbox.
We encourage you to explore this feature and incorporate it into your workflow, ensuring that your data remains up-to-date and your tasks run smoothly.

